Since 2006, Mulesoft is offering middleware and messaging. Back then, building integrations was still heavily XML file based, with a set of Eclipse based plugins. This has changed though! With their Anypoint Studio, an Eclipse-based graphical development environment for designing, testing and running Mule flows, they really upped their game. Together with their new IPaaS platform CloudHub and their API capabilities, Mulesoft is looked at as a big player in IPaaS and API arena as shown in a previous article here where both Gartner and Ovum rate them as leaders. To add to that, Mulesoft was placed in the Forbes Cloud top 100 at number 20.
As I was quite curious how the new studio compared to my daily integration work with JDeveloper, I downloaded it and gave it a swing with a simple integration. You can download Anypoint Studio right here.
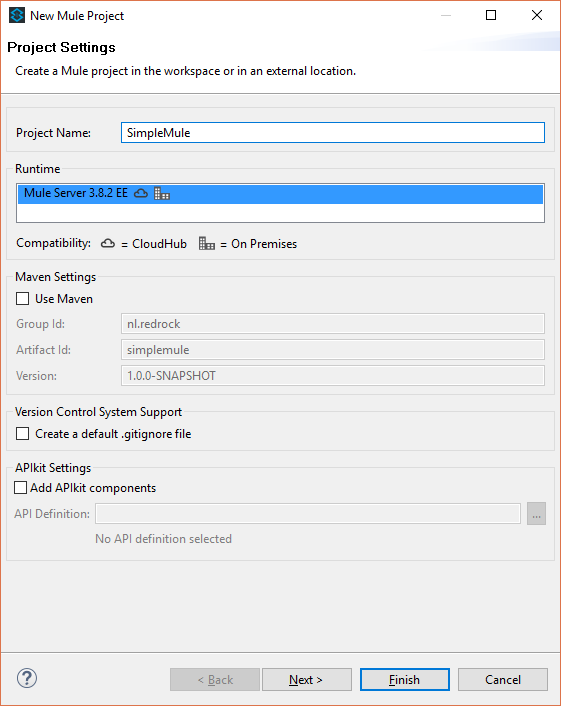
I started of by creating a simple mule project. File > New > Mule Project and clicking finish. As you can see, you can also use Maven but I will leave this unchecked for now.
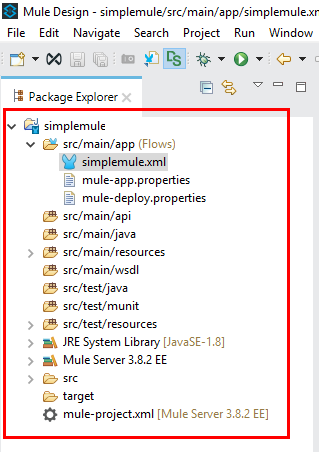
After clicking finish you will see that it generates a project structure on the left side:
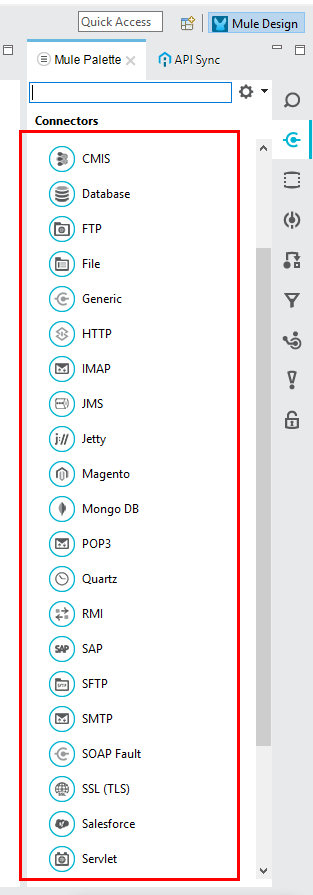
In the middle is the canvas on which you can drag and drop items from the palette which is on the right. Straight away you can see there are quite a few connector which come out-of-the-box.
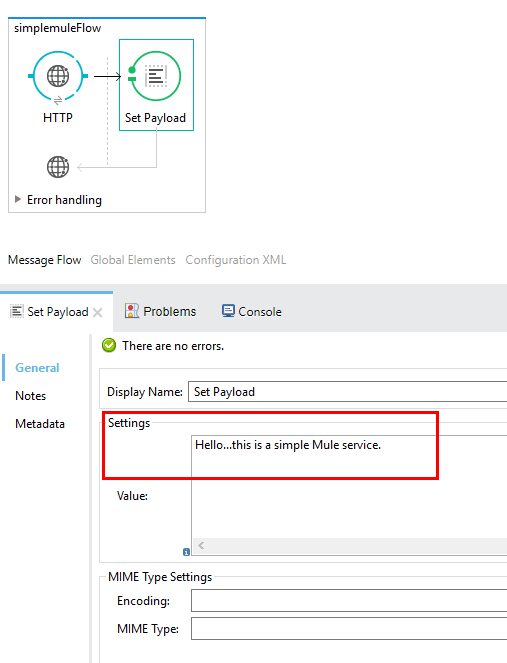
I will start of with a HTTP connector. You can search in palette by typing HTTP. Now just drag the component onto the canvas. When you select the component, you can see the properties at the bottom. I will just keep the HTTP Display Name but I will set the Path to /simplemuleservice. Then I will need to generate a listener configuration by clicking the + sign on the right. I will accept all the default values which are 0.0.0.0 at port 8081. Next I am going to add a simple response. Look for Set Payload in the palette and drag it in the box next to the HTTP connector. Now select it and input a value. Mine is Hello…this is a simple Mule service.
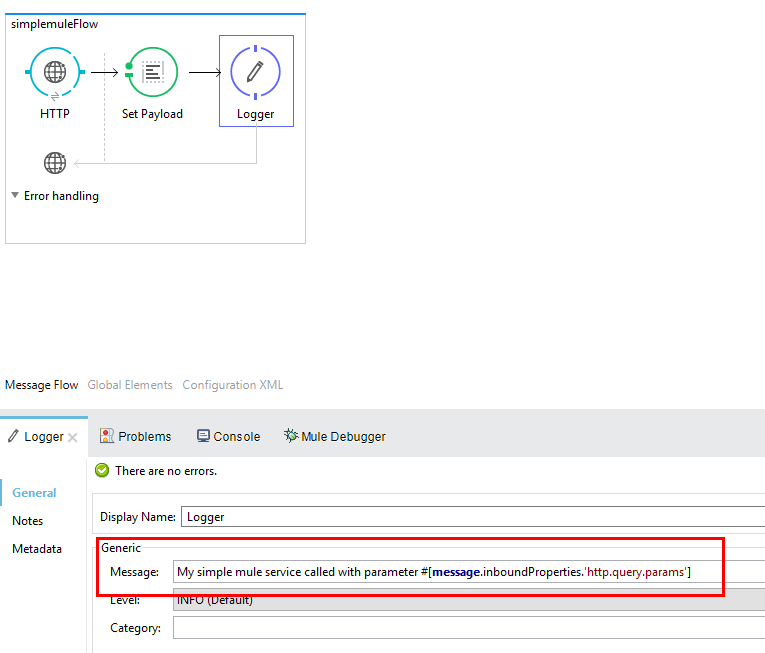
Next lets add some Logging. Add the Logger component and add it to the canvas. In the Message property of the Logger we can state what we want to log. The settings for the logging are defined in the log4j2.xml under resources. You can also use the Mule expression language here to access all sorts of info. I will just log all of the parameters send with the request by adding the next message: My simple mule service called with parameter #[message.inboundProperties.’http.query.params’]
Now save the whole project. Lets see if it also runs. Just right click the application a choose > Run as > Mule application.
You can see the application is running.
Now open your browser and type in server and port you defined. In my case http://localhost:8081/simplemuleservice. As I also added the parameters to the Logger step, I will also add some of those like this: http://localhost:8081/simplemuleservice?caller=Hugo&message=Hi
As you will see the browser will respond with the output we defined.
As you can see, creating a flow is much easier then before. Underneath it is still al XML but the visual wrapper around it makes it easier to work with in my opinion. This was actually a very simple flow. The next step is to do something which is a bit more work but more like an actual usecase.
Lets say we have a SOAP service running on-premise. We want to expose that service as an API to the outside world. So basically 2 things:
- Design the API first
- Convert REST to SOAP and call the webservice
- Convert the SOAP response back to a JSON result and return it
I want to make an API for a webservice which I have used before…..the ConversionRateService. It has 2 input values. FromCurrency and ToCurrency. The result is ConversionRate result. So let’s start with creating a simple RAML file. Mine looks like this:
#%RAML 1.0
title: Conversionrate API
version: v1.0
baseUri: http://conversionrate/api
mediaType: application/json
documentation:
  - title: Introduction
    content: |
      API to lookup currency conversion rates
/convert:
  get:
    responses:
      200:
        body:
          example: |
            {
                "conversionrate" : "1.2345",

            }
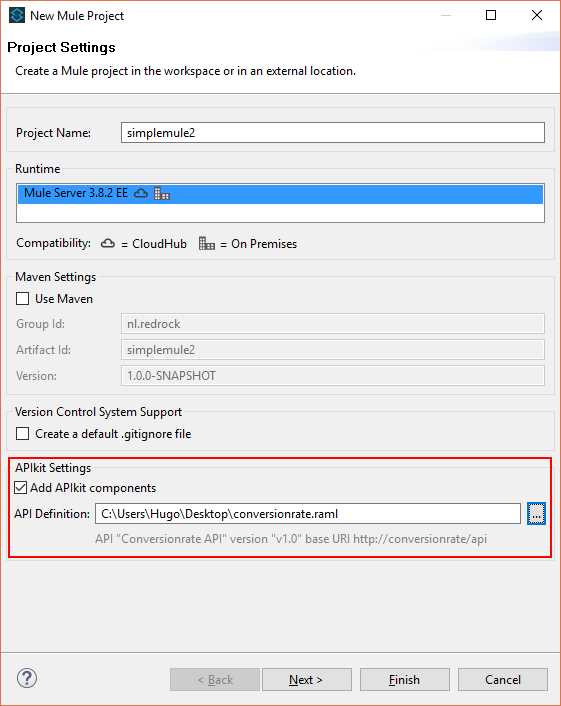
Now that we have our RAML file, start a new project, in my case simplemule2. Don’t forget to tick the Add APIkit components box below and select the RAML file we just created.
When you click finish, Anypoint Studio will generate skeletal backend flows, based on the RAML file. The next step is to delete the Set Payload in the get:/convert:conversionrate-config. This is the flow in which we will call our webservice. Drag the Web Service Consumer component onto the canvas. Then down below we can create a Connector Configuration.
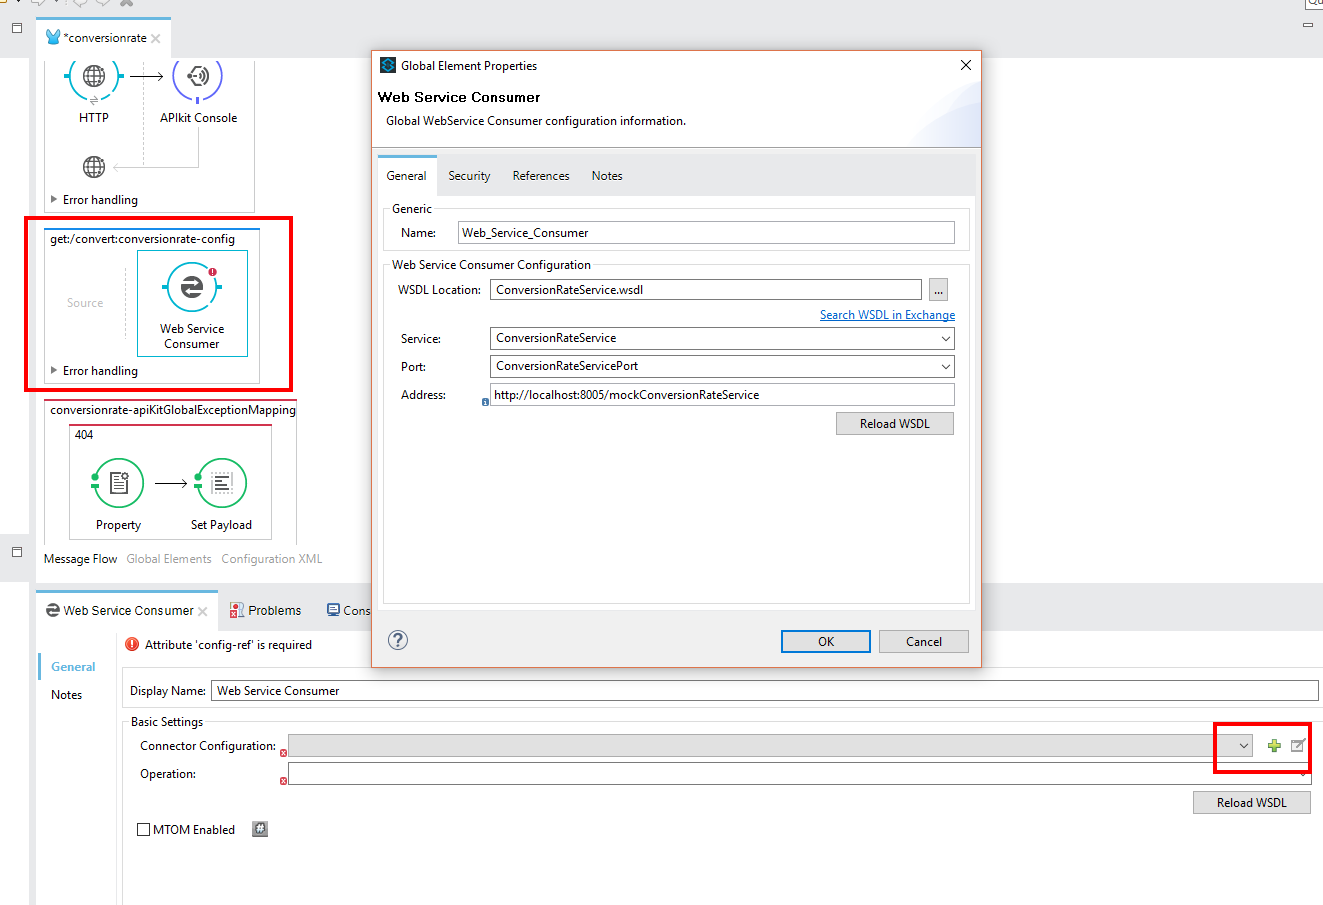 . I used the WSDL from an old project here.
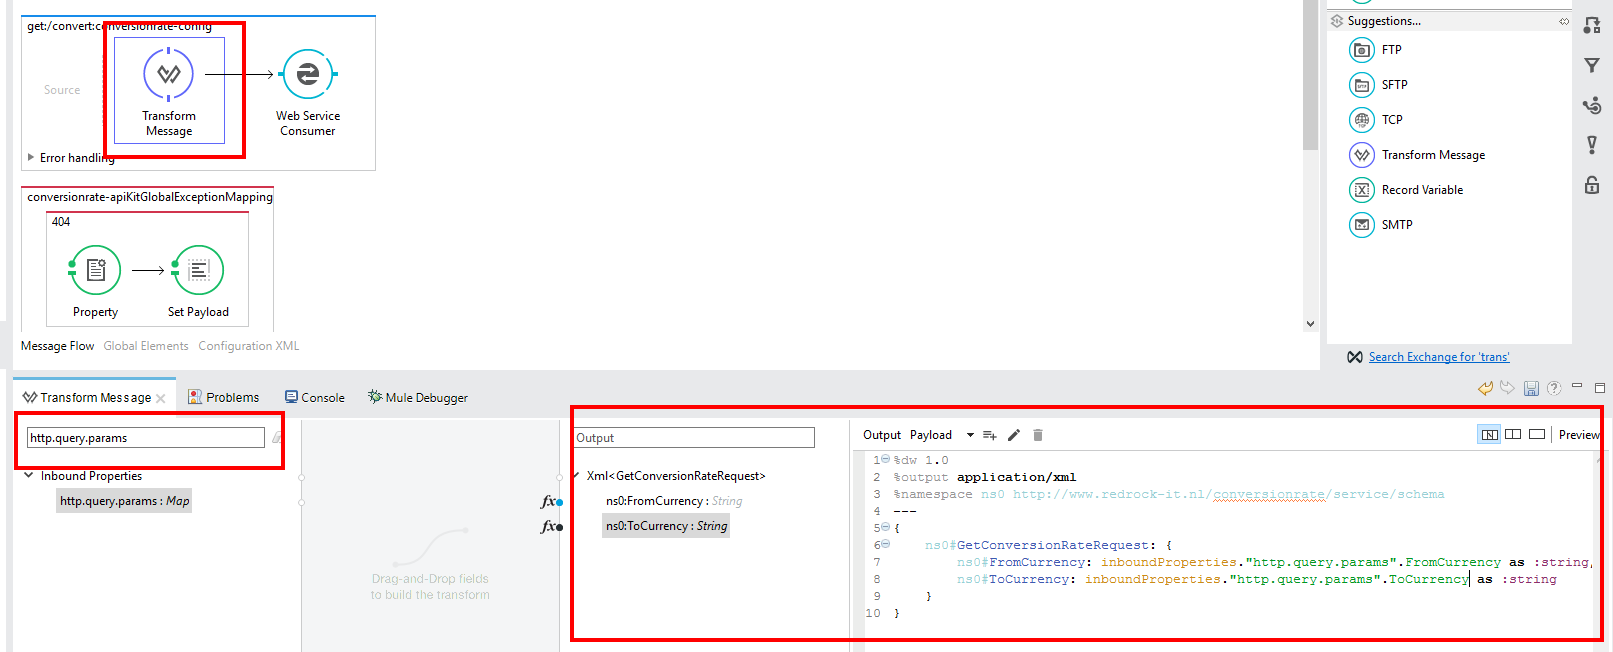
Now that I have the call to the webservice, I have to map the rest call to soap. Drag a Transform Message before the Web Service Consumer component. If you look at the properties below, you can see on the left side the Input, and on the right side the output. As the input parameters will be incoming as http query parameters, we can just type in the mapper file on the right, how we want to map them.
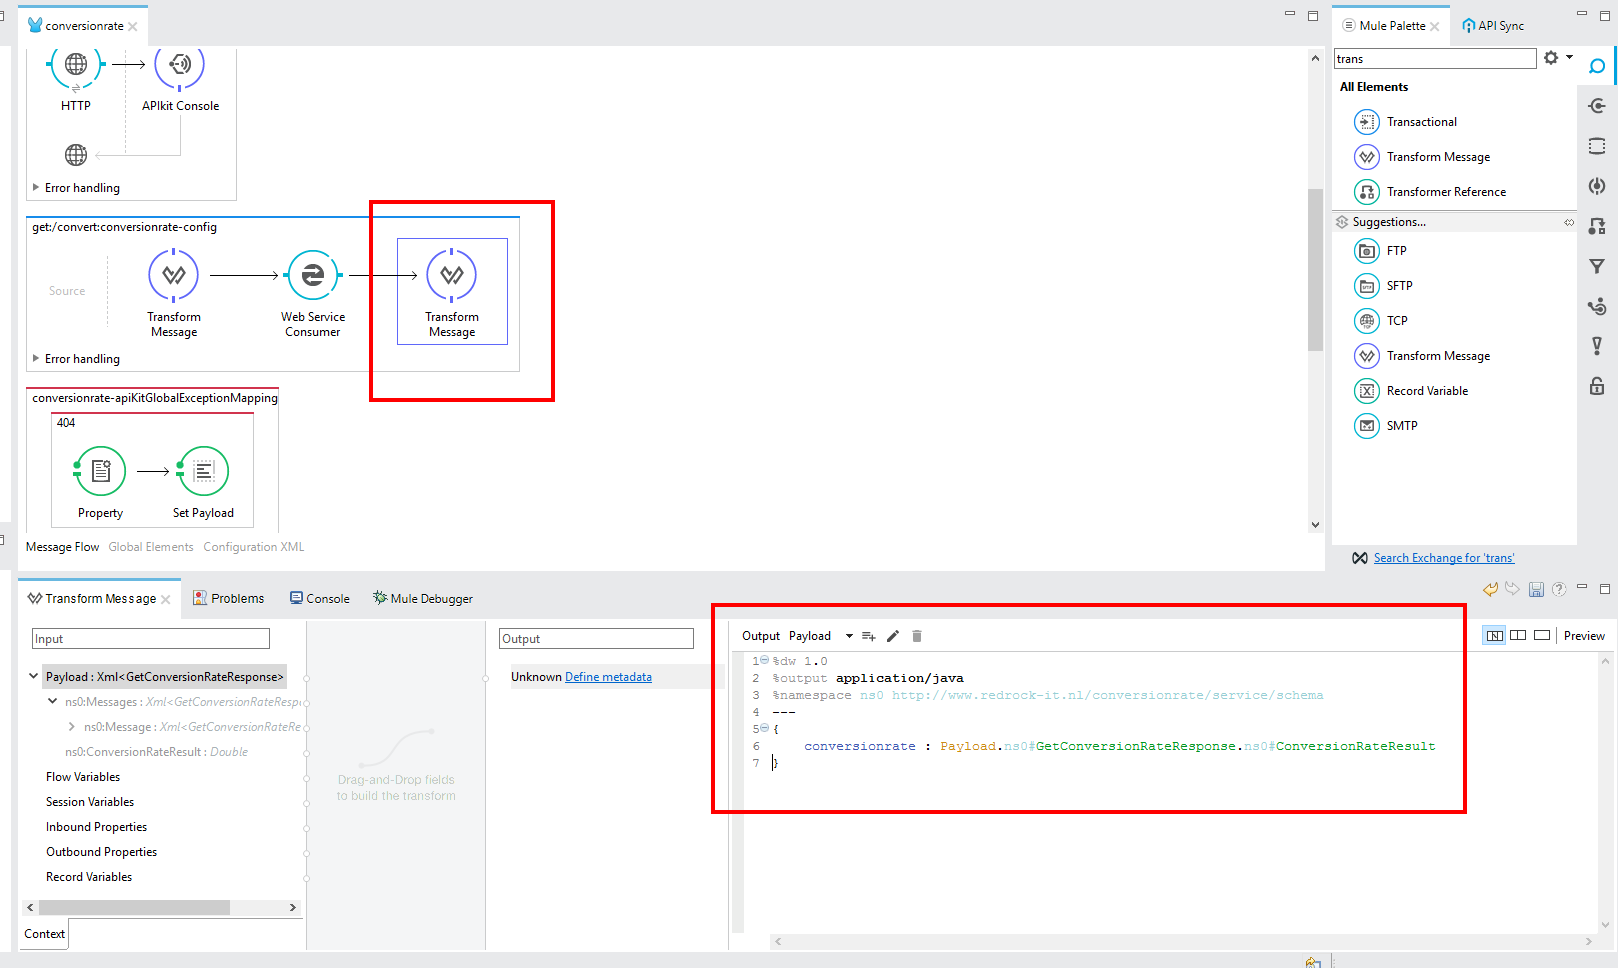
Next we want to transform the result from SOAP to a JSON response so drag another Transform Message but this time place it after the Web Service Consumer component. Again look at the properties below. On the left side you can the the data model of the webservice response. The right side Output shows unknown. As I just want to map the response, you can edit the result on the right side like shown below:
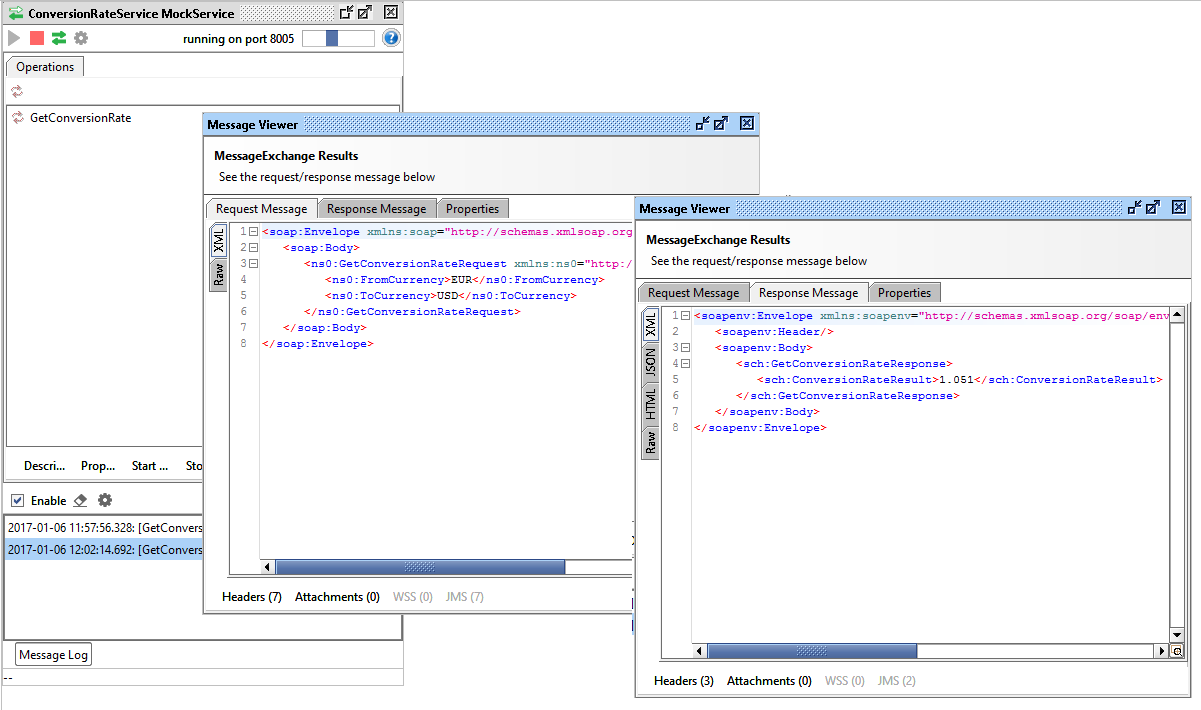
As you can see, we will return a simple JSON response in which we map the conversionrate field to the webservice response field ConversionRateResult. Save it and we are ready to test the application. To make it easy for myself, I have created the conversionrate webservice using SoapUI by importing the WSDL and creating a Mock service. It is running on http://localhost:8005/mockConversionRateService as defined in the Web Service Consumer component.
Now right click the application and choose Run as–> Mule application. As you can see it will also start the APIkit console automatically. It shows the description of the API and an interface to make calls. I will just use a good old browser call like this: http://localhost:8081/api/convert?FromCurrency=EUR&ToCurrency=USD which result in
As you can see, it hits the SoapUI mock which returns a SOAP response which is processed by Mule which returns a JSON response.
I was surprised how easy it was to create an API design first. The UI works nice and easy and everything is deployed nice and fast on the integrated Mule server. I have just scratched the surface here of Mule’s capabilities but I am liking what I am seeing.


